


Lorem ipsum dolor sit amet, consectetur adipiscing elit. Ut elit tellus, luctus nec ullamcorper mattis, pulvinar dapibus leo.
There are three different ways to create your design.
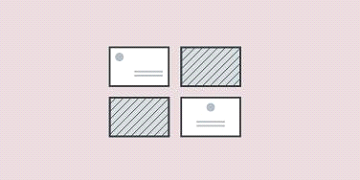
Use our Templates: For certain products we can provide you with a template to create your own designs. Our template is set with the basic dimensions and may offer you some inspiration or boundaries to start off.
 Design here online: Our online designer is available for certain products. Choose the ‘Design here online’ if you want to quickly and easily customize your product. This feature offers a variety of layouts to choose from.
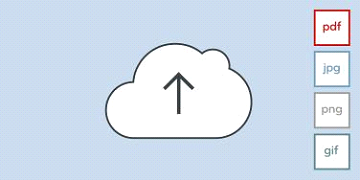 Upload a full design: Uploading your own files offers full flexibility and control over your design. Whether you have creative experience or your very own designer, this is the perfect way to create your product. However please respect the printing standards for the bleed, trim and safe zones and printing resolution.
Always remember to check the text for spelling and grammar and make sure no important information is missing from the artwork before supplying the finished file to us for printing.
One should also ensure that the dimensions are correct including bleed, trim and safe zones. The printing resolution is equally important.
Please note that the printing process uses the CMYK colour spectrum and images will display brighter on a screen. Artwork should be created in CMYK colour profiles for a better representation of how the artwork will look once printed.
The printing file once submitted to us is presumed to be confirmed and final.
Colours displayed on screen will always look brighter and more vibrant than the final printed colours, so you may need to compensate for this when editing your images.
Artwork displayed on light emitting screens such as computer monitors, TVs, tablets and smartphones uses Red, Green and Blue (RGB) colour values.
Cyan, Magenta, Yellow and Black (CMYK) are the basic ink colours that printers use to build a full colour print.
We recommend previewing and editing your files in CMYK colour profile. You may choose to adjust your brightness (for photos), or CMYK colour values (for vector/text-based designs).A PDF, which is short for Portable Document Format, was created to be the most universal way to communicate with documents. Submitting a file as a PDF allows the creator to control many aspects of their file, such as verifying colour mode, embedding fonts, compressing file size, and combining files.
Most file formats you use to print at home or in your office are not designed to include all the information that a printer would need. For example, Microsoft Word prints by using the information in the file that you are working with as well as information stored on your computer, such as font and color settings. If you were to send that file to a printer, they would not have the same information that your computer has. When you save a file as a PDF, you are essentially packaging all of the components of your design into a single file. This ensures that whoever is viewing your file on their own device can view it as you intended.
Having said this, it is still very important to ensure that any unique fonts are embedded in the pdf file.
When you embed a unique font, you are allowing your PDF file to display text the way you designed it, whether the computer you are viewing your file on has the font or not.
Unembedded fonts can be an issue that goes unnoticed until the final print is received. Some programs will automatically replace an unembedded font with a different font, if the printer’s computer or program doesn’t have the font downloaded.
You may have used a fun font such as “Orange Slices” when designing your file on your computer. However, when it is sent to another person, that person’s computer may not have “Orange Slices” installed! In this case, that person’s computer will use a default font (such as “Arial” font) to display everything that was designed in “Orange Slices”.
PDFs allow you to check if the fonts are embedded. It is as easy as clicking the “Ctrl” and “D” keys at the same time. Then a pop-up window will appear and under the “Fonts” tab, there will be a list of all the fonts used in the file and state if they are embedded or not.
In addition to a larger file size, JPG, JPEG or PNG files have several limitations compared to a PDF file. A PDF file has color formatting information, such as color mode and color profile information which allows the printer to get more insight on the client’s intended colours and gives the printer the ability to make color adjustments as necessary.
Sending large file sizes can be tricky and take a long time! PDFs can compress the size of the file without decreasing resolution quality.Resolution is a critical characteristic of your design and will determine the quality of your final print. Having artwork or images included in your artwork at low resolution is a very common issue especially if the source of the image is a simple search from the internet. Artwork in low resolution is often not detected when viewed on a small screen such a smartphone or tablet. The only way to fix this problem is to replace the artwork with a high-resolution image or file. There is no way a printer can resolve the problem of a low resolution file.
300 PPI (Pixels Per Inch) or 300 DPI (Dots Per Inch) is the optimal printing resolution for digital printing presses. This applies to all print products, from small products like business cards and keychain printing to larger products like poster and booklet printing. Designing a file in lower than 300 PPI will lead to blurriness and pixelation. On the other hand, there is no point in designing at higher than 300 PPI. As far as the eye can tell, there will be no difference in print quality. It will only make your file significantly larger and creating problems to upload, download and process a printing file.
In practical terms 300PPI means that every inch of your artwork contains 300 pixels (or dots). If converted to centimeters it means that for every 2.54cm there are 300 pixels.
Using the example of a design file size 21.59cm (8.5”) wide by 27.94cm (11”) tall with a 300PPI resolution the total number of pixels should be:
We recommend that you set the resolution to 300 PPI before starting to design your file. Increasing the resolution after you start is still likely to result in blurriness/pixelation.
“No bleed” printing is the traditional print on demand printing we are used to doing at a local stationery shop, at home or at the office.
“No bleed” printing is when your desktop printer prints a standard A4 sheet of paper and leaves a thin white margin around the sheet. Having said this, all domestic, commercial and industrial printers, with the exception of a very few, leave a white border around the edges of the paper. This means none of the printing is done till the edge of the paper.
So, what happens if you want to print to the edge? What happens if you want the background of your design to extend all the way to the edge?
Your desktop printer at home can’t print it. Neither can the slightly larger printer you have at work. You think: “maybe printing companies have a special printer that can print edge-to-edge”.
No!
Printing companies still experience the same white border around the paper’s edge. However, the printer will go through a simple but important procedure so that their customer’s products have printing all the way to the edge of the sheet.
“Full bleed” printing refers to when a printing product has printing to the edge of the sheet.
To produce a full bleed A4 (297mm by 210mm) size print the following basic steps are followed:
You are able to request for your file to print “no full bleed”, so that your file contains 0.2” white border on all 4 sides. This is the ideal choice when important content is getting cut off and you are not able to fix your file.
If your design has a white background, then you do not need to ask for a full bleed printing. Ask for a full bleed printing when the design has a solid colour background or border, and you wish to extend to the edge of the sheet.
Full bleed printing requires larger sheets and more technical labour resources. The price is more expensive then no full bleed printing. If you are looking to save money, no full bleed printing might be able to keep you within your budget!
Your file will always need to be designed properly for full bleed printing. Otherwise, there is a high risk that important content from your file will be partially or completely cut off.
The parameters are simple for a “full bleed” printing. Follow the information below regarding safe area, trim, and bleed. This way important details within your artwork will be placed and printed correctly.
These elements compensate for industry standard variations that occur during the printing, binding and trimming processes. These variations are small, normally not more than 2 to 3mm, but are highly critical and will impact on the final product.
It is very normal that shifts in the print occur from one page to another especially when printing on two sides of a sheet. The bleeds and safe areas allow for safe tolerances.

Trim
Trim size represents the dimensions of your final product. To arrive at a full bleed print, the artwork must extend beyond the trim size to the “bleed” line. This is done to avoid white borders at the edge of your print once it is trimmed to size. When the artwork is prepared it is normal to show small lines in the upper and lower corners called the “crop marks” to indicate where the artwork is intended to be trimmed.
Safe Area
This is an area inside the trim area. The safe area is a smaller area than the trim size and therefore smaller than the final print size. The safe area is where you should place your most important information of your design. Any content outside of this area is in risk of being cut off during the trimming process. The distance between the trim line and the safe area line may be as little as 3mm or as large as 10mm. There is no fixed rule on this since it very much depends on the additional finishing processes required and the use of the print.
Bleed
Bleed is the portion of your design that extends past the trim size. Bleed is cut off when the print is trimmed to the final size. Its sole purpose is to make sure your design or image reaches the very edge without leaving any unsightly white edges. The bleed is commonly between 3mm and 10mm larger than the trim size but again same rule as the safe margin – it really depends on the print size and how it will be trimmed.
There is no fixed rule as to the size of the artwork. We can print any custom size if it is technically possible and feasible.
One major consideration which is often overlooked especially when printing invitations is the availability of envelopes. We strongly recommend that if the product will be delivered to the recipient in an envelope, you do check the availability of envelope sizes and then plan the artwork to fit the envelope. Normally the print is between 5mm to 10mm smaller than the envelope size. However, this depends on the material being used and the additional contents that will go into the envelope.
Same principle applies if the artwork is a poster that will be framed or put in a folder. Start off by checking the size of the frame or folder to make sure that once you have the print in hand it can fit in its intended place.
Standard paper Sizes
The two main common paper sizes are the American and European ISO standard sizes. The ISO A series is the most frequently used page measurement standard. The ISO B sizes are used for poster printing while ISO C is meant for envelopes. The SRA paper sizes are standard sheet sizes used in the printing industry mainly to produce full bleed prints. All paper dimensions are specified in inches or millimetres. All our artwork and printing sizes are in millimetres. Therefore, to avoid unnecessary problems we will ask our clients to quote all dimensions in mm.
ISO A paper sizes
The A-series consists of a logical set of paper sizes. The largest size (A0) measures one square meter. The height/width ratio remains constant (1:1.41) for all sizes. This means you get the A1 size by folding an A0 paper in two along its shortest side. Then fold the A1 size in two to get an A2 size paper, and so on… A-sizes are used to define the finished paper size in commercial printing: A4 is for office documents, A5 is for notepads and A6 is for postcards.

This drawing illustrates the principle behind the ISO A series:

When choosing paper or cardstock it is important to consider paper weight, which is a big part of the look and feel of your wedding invitations, greeting cards, and other printing projects. The right weight can create your desired first impression. Colour, texture and finish are other factors one will consider when choosing the paper.
If you have experience with printing or have purchased paper for printing you may have come across the acronym “GSM.”.
What Does GSM Mean?
Although in practice different paper is distinguished by thickness in the paper and pulp industry, paper is measured by grammage and not thickness. The area density of a paper product is expressed in grams per square meter (g/m2), or the weight of one sheet of 1-metre x 1-metre card.
Grammage is more commonly referred to by its unofficial abbreviation: GSM. While grammage is technically the proper term for paper weight, printers and customers refer to GSM as the “weight” of a card.
It is worth noting that a 300gsm sheet of card is very likely to be thicker than a 100gsm sheet and very often it is correct to assume that the higher the grammage the thicker is the paper. However, one cannot use the grammage to determine the exact thickness of a paper since there are other factors such as the material composition and density that determines the weight of a paper.
Paper products in different GSM classes are better suited for certain applications. For instance, paper with a lighter weight is generally designed for printing and writing. In contrast, heavier and thicker paper is ideal for specialised applications, such as invitations, greeting cards, and business cards.
Business cards usually come in the heaviest card available. As they’re designed to be passed around between contacts, business associates and customers, business cards need to be thicker and durable, explaining why they’re made from high-GSM durable card.
On the other hand, flyers promoting a sale or event are usually disposable, hence why they’re made from a light, low-GSM paper.
The chart below gives you a rough idea of the feel of different products in each GSM range.
The right choice of card thickness or GSM ultimately depends on your needs and preferences.
Our range of paper:

